Creating a Simple NAS
In this article, I document the process I went through in setting up a NAS (network attached storage) using an old computer, two 1TB hard disks, Ubuntu 22.04, Webmin, and Samba. I go through the technical steps as well as some personal notes on the process.
I intend for this article to capture the knowledge I gained along the way in making this project. Hopefully, it also serves as a good tutorial for others.
Background
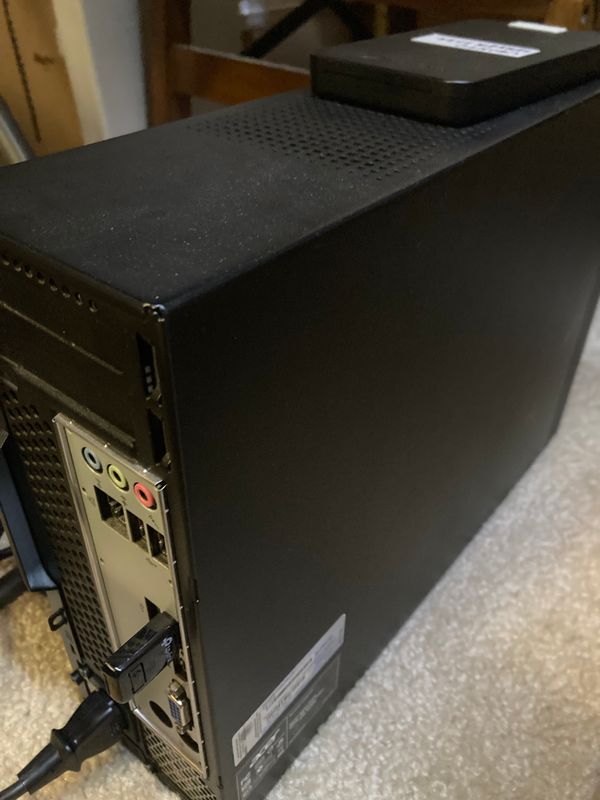
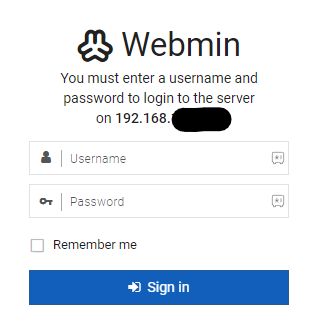
I wanted a secure place where I can store some local files and backups.
- NOT for daily storage usage
- System will be powered off most of the time
- Two duplicated/mirrored drives for hardware redundancy and safety (using RAID1 configuration)

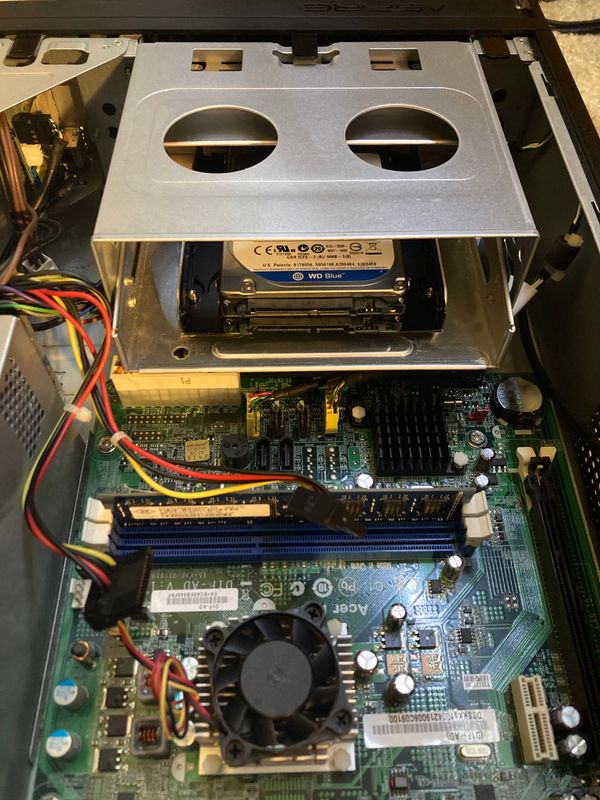
Hardware for this project was simple and breathed new life into some old, unused hardware.
- Old, small desktop computer I picked up from a friend a few years ago
- Two 2.5" 1TB hard disks (model: xx)
- Some SATA and SATA power cables (had to buy/find some that didn't have 90 degree connectors)
- CD-ROM to hard drive mount (luckily I had this)
- 3.5" to two 2.5" hard drive mount (had to buy this)
Methodology
It took some time to figure out the steps, but setting it up was not too difficult. Webmin, a web interface for remote server configuration, made the process much easier.
1. Install and Configure Ubuntu Server 22.04
You can pick up a copy to install from the official website.
I loaded the .iso onto a USB Flash drive using balenaEtcher.
Boot into the live environment of the USB drive, and use it to install Ubuntu onto a seperate drive/SSD/flash drive that you will use as the boot drive for the machine.
I used an external SSD connected via USB as the boot drive.
- I only have 2 SATA ports on the motherboard, and those will be occupied by my two hard disks.
Run the following to update the system and packages, followed by a reboot:
sudo apt update
sudo apt full-upgrade
sudo reboot
Note that
apt update and apt-get update
have the same functionality, as does
apt full-upgrade and apt-get dist-upgrade
If you need configure a wireless network connection, run:
nmtui
to open the network manager text user interface (I find it easier to use than the command line interface).
Ethernet will work out of the box.
2. Physically install hard disks to create a RAID with
What is a RAID? Redundant Array of Independent Disks.
There are several different configurations of RAID you use.
I went with RAID1 - mirroring data between two or more drives. Both drives need to fail in order for my data to be lost, creating some hardware redundancy and safety.
It is best to use the same model and storage size for drives in RAID1 configuration, as that way you can ensure there is no major difference in read/write speed or implementation that may cause issues in mirroring down the later.
I installed two 1TB hard drives in my machine. This gives me about 1TB of space for storage, which is enough for my purposes.
3. Install Webmin
Webmin is a web interface that greatly simplifies (remote) server configuration. I used it, you don't have to use it if you just want to stick to command line only.
It's a little bit of a process to install Webmin. I mainly followed this article.
sudo apt update
wget -qO- https://download.webmin.com/jcameron-key.asc | sudo gpg --dearmor -o /usr/share/keyrings/webmin.gpg
sudo nano /etc/apt/sources.list

(add this line to the end of the file)
deb [signed-by=/usr/share/keyrings/webmin.gpg] http://download.webmin.com/download/repository sarge contrib
sudo apt update
sudo apt install webmin
Webmin will begun running an instance once it has finished installing.
Some additional commands that may be useful
You can check if Webmin is running with:
systemctl status webmin
To start or stop Webmin:
systemctl start webmin
systemctl stop webmin
Webmin will automatically start up when the system starts up. You can modify this behavior with enable and disable
respectively.
systemctl enable webmin
systemctl disable webmin
Note that enabling the service will not start running the service until the next system start. You can run
the following to enable AND start running at the same time.
sudo systemctl enable --now
4. Access Webmin
Once Webmin is installed, it will spin up a server on the machine that will be hosted on the local network via opening port 10000.
We can access this server from any other machine on the network by
connecting to https://<local_ip>:10000.
You can get your IP address on Ubuntu with ip a and then identifying the network interface that is active.
The name of the interface might start with eth (ethernet) or wl (wireless).
Note: since Webmin's SSL certificate is self-signed, you may receive a security warning from your browser. Navigate past this and you will be greeted with the Webmin login screen. Use the credentials of a user on the host (ubuntu) machine to log in, and you will be greeted with a dashboard.
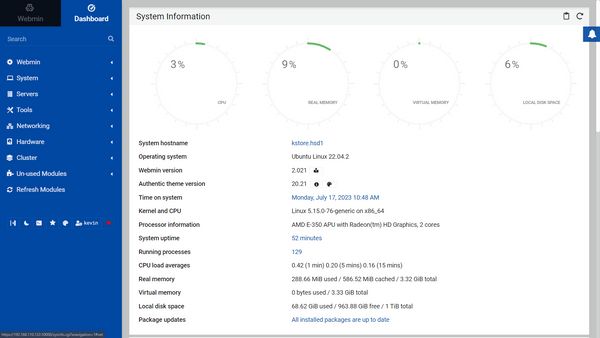
Small aside: How does webmin host a server locally?
- local ip + open port -> router -> directs it to the correct machine at specified port
- at least that's how I think it works
5. Clear data or any partitions that may exist on the newly installed drives
Check if the disks contain any data or partition tables on them with
lsblk
Clear any data and formatting that might be on the disks with fdisk.
fdisk -l
sudo fdisk /dev/<drive_name>
In fdisk, use d to delete a partition, p to print current partitions, and w to confirm and write changes.
Fdisk will not perform any operations until you confirm it at the end.
This step might be unnecessary. For some reason one of my (new) disks seemed to have a remnant copy of windows on it, so I cleared it while troubleshooting.
6. Create a RAID
We will be creating a RAID using mdadm.
sudo apt install mdadm
Webmin simplifies the process for creating a RAID by providing you with a GUI
that will build and run the mdadm command.

Webmin > Hardware > Linux RAID
Create RAID device of level > RAID1 (Mirrored)
Select the partitions/disks > Create RAID
For more insight into the mdadm commands themselves, try this article from DigitalOcean.
7. Add a filesystem onto the RAID
This can be done through Webmin or running mkfs commands. Either option will
create an ext4-formatted file system on the RAID. Think of the newly created RAID
as a new, unformatted piece of storage hardware. To the system, it looks the same as a new, unformatted
hard drisk drive.
Webmin > Linux RAID > select your RAID device (probably /dev/md0)
Create an ext4 file system
OR
sudo mkfs.ext4 -F /dev/md0
If you try mounting the RAID before adding a filesystem to the raid, you may receive this error. I know this because I made this mistake (oops).
8. Mount the RAID to a folder in the home directory
The RAID is now formatted as a valid filesystem for storage. We need to mount it to tell the system that it can access this device for storage.
In Webmin:
Webmin > System > Disk and Network Filesystems > Add mount (ext4)
Mounted as > (whatever folder, I used /mnt/raidmount)
New Linux Native Filesystem > RAID device > RAID device 0
Create
Command line:
mkdir -p /mnt/raidmount
sudo mount /dev/md0 /mnt/raidmount
We are telling the system that we can access the new storage device through a certain folder (i.e "mounting").
9. Install Samba
We will be using Samba to create a file share that is accessible from Windows (and other operating systems). You can also use NFS if you do not need Windows accessibility.

Install Samba:
Webmin > Un-used Modules > Samba Windows File Sharing
Install
OR
sudo apt install samba
Samba should start running automatically once it has been installed.
Check samba is running with:
systemctl status samba
10. Create a new file share
Navigate to the Samba configuration page in Webmin and create a new file share.
Webmin > Servers > Samba Windows File Sharing
Create a new file share
Share name > (name it whatever you want)
Directory to share > /mnt/raidmount (whatever you named the mounted file)
Create
11. Add an account to access file shares
This will be credentials used to connect to and access the share from another device. We will be converting the current unix system users to also be Samba users.
Samba Windows File Sharing > Convert Users
Samba Users > (select a user) > (change their password if you want)
These will be the usernames and passwords you can use to access the fileshare from another system
12. Configure Samba and the file share
There are a few more things to configure before we can access and write to the file share. We can edit the config file directly, or go through a bunch of menus. For throughness, I'll show both.
(select your created share) > Security and Access Control
Writeable > Yes
Guest Access > None
Guest Unix user > root
Save
(select your created share) > File Permissions
Force Unix user > root
Can delete readonly files > Yes
Finally,
Samba Windows File Sharing > Global Configuration > Windows Networking
Security > User level
If we navigate to the Samba config file, it should look something like this:
Samba Windows File Sharing > Global Configuration > Edit Config File
[kstore]
    writeable = yes
    path = /mnt/raidmount
    comment = kevin samba share
    browsable = yes
    force user = root
    delete readonly = yes
    hide files = /lost+found/
    guest account = root
My file share is named kstore. I also added the hide files = /lost+found/ line
since my root RAID folder /mnt/raidmount (which is the folder I shared) has a lost+found
folder that can sometimes hold bits of corrupted files the system find when checking the file system. Alternatively, you can just make a file share that is a deeper level folder
than the directly mounted folder so users don't have to see the lost+found folder if it exists.
Side note: I'm not completely sure as to the security of forcing users to become root, but I haven't looked into this to see if there's a better configuration for a Samba file share
13. Access Samba file share from Windows
We can now access the file share from Windows through through the file explorer. In the directory bar, access the file share by directly addressing the IP of the machine (same IP used to access Webmin):
\\<local_ip>\<share_name>
(log in with the username and password of a Samba user you set)
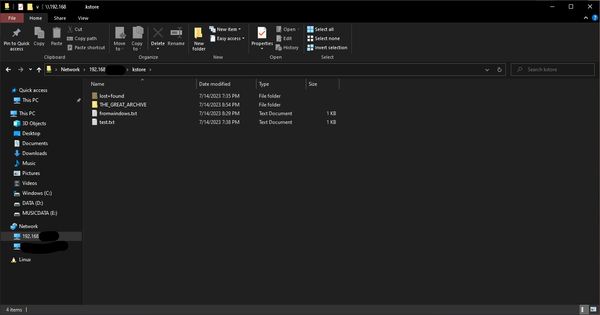
If you are unable to write to the file share, check the permissions settings of the file share in Webmin.
Future Considerations
- Turn on and off remotely.
- I plan to hook up my remote power switch I made to this machine, after I iron out some connection stability issues in that code.
- Measure power consumption of the machine when on.
- Install a PCI to SATA port adapter to accomodate the boot SSD inside of the machine instead of it being and external USB drive.
- Automatic/streamlined system for moving backups and files onto this machine.
- Need some way to duplicate certain files across local disks and others onto cloud services.
- Basically, prevent the scenario where I have random copies of backups at random times strewn around.
- Use rclone/borg/kopia/restic?
Thank you to these articles
These articles helped immensely for setting this system up. They might help you too!
Ubuntu Server and Webmin NAS File Server
- I used this article to set up and configure the Samba file share.
How to Install and Use Webmin on Ubuntu 22.04
- Provided up-to-date instructions for setting up Webmin.
Creating a NAS with Ubuntu Server
- This article is a little bit old, but it provided me a very good overview of the process and all the steps required. It gave me the background knowledge that allowed me to find the other two articles above.
- I recommend starting with this article and branching out from there to find more up to date information and commands.